Discovering unsightly mold on your reusable water bottle’s gasket can be a startling and unwelcome sight. Far from being a mere aesthetic issue, mold growth signals a need for immediate attention to ensure your hydration habits remain healthy and safe. These dark, slimy invaders thrive in the damp, enclosed spaces of bottle seals, posing potential health risks ranging from allergic reactions to respiratory issues. Fortunately, you don’t need harsh chemicals or specialized services to tackle this common problem. With a few common household items and a methodical approach, you can effectively eradicate mold and implement simple strategies to keep your water bottle gaskets pristine. This comprehensive guide provides step-by-step DIY methods, preventative measures, and expert tips to ensure your favorite bottle remains a source of fresh, clean hydration.
Understanding Mold on Water Bottle Gaskets: Causes and Concerns
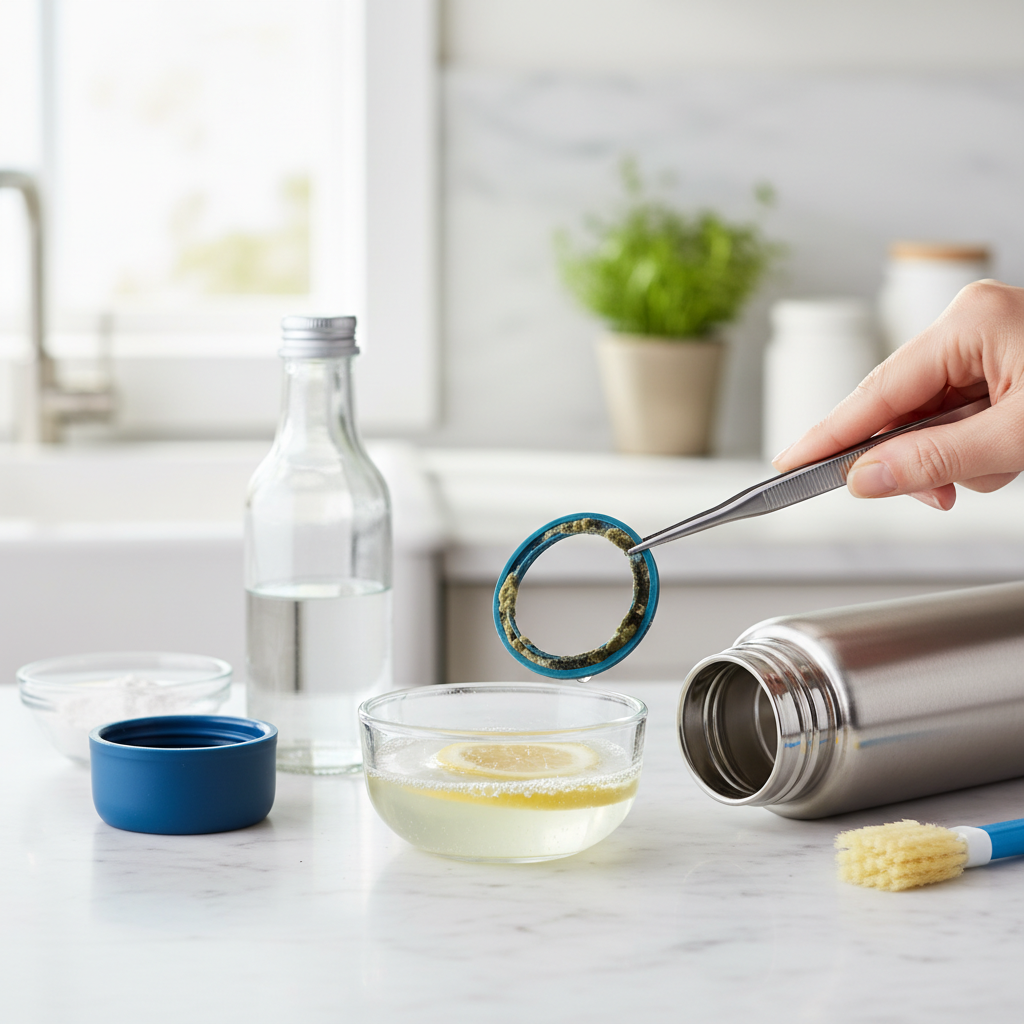
Mold on water bottle gaskets is a widespread issue, often appearing as black, green, or even white fuzzy patches in the crevices of silicone or rubber seals. These gaskets are critical for creating an airtight, leak-proof seal, but their design—often featuring tiny grooves and being frequently exposed to moisture—makes them prime breeding grounds for mold spores.
The primary culprits behind mold growth are moisture, darkness, and organic residues. When a water bottle is not thoroughly dried after use, trapped water creates the perfect humid environment for mold to flourish. Residues from drinks like juice, milk, or even saliva, provide the necessary nutrients for spores to germinate and grow rapidly. Combined with the typically dark conditions inside a closed bottle, gaskets become ideal incubators for these microorganisms. Ignoring mold on your water bottle gaskets can have health implications. Mold exposure can lead to allergic reactions, asthma attacks, skin irritation, and respiratory problems. It’s not just about a bad taste or smell; it’s about safeguarding your health.
Essential Tools and Supplies for DIY Mold Removal
Before you begin the mold removal process, gathering the right tools and supplies will make the task more efficient and effective. Most items you’ll need are likely already in your kitchen or cleaning cabinet, emphasizing the DIY nature of these solutions.
For scrubbing, a soft bottle brush is indispensable for reaching inside the bottle, while a small brush like an old toothbrush or a specialized straw brush is perfect for tackling the intricate grooves and crevices of the gasket itself. A clean cloth will also be useful for wiping and drying. When it comes to cleaning agents, you’ll primarily rely on common household items: white vinegar, baking soda, 3% hydrogen peroxide, and regular dish soap. In some stubborn cases, a diluted bleach solution might be considered, though with careful precautions. It’s always a good idea to wear gloves to protect your hands, especially when dealing with cleaning solutions.
Step-by-Step Guide: How to Remove Mold from Water Bottle Gaskets
Successfully removing mold from your water bottle gaskets requires a systematic approach, ensuring thorough cleaning and disinfection without damaging the seal. Follow these detailed steps to restore your gaskets to a pristine, mold-free condition.
Initial Preparation
|
Our Picks for the Best Bottle brush in 2026
As an Amazon Associate I earn from qualifying purchases.
|
||
| Num | Product | Action |
|---|---|---|
| 1 | Holikme Bottle Brush Tube Cleaning Lab Set with Long Handle, Cup Cleaner for Washing Narrow Neck Beer Wine Decanter Pipes Lids Sinks Cap Covers, White |

|
| 2 | Holikme 6 Pack Bottle Brush Set, 14" Long Handle Stainless Steel Bottle Cleaner Brush, 3 Straw Brushes, 3-in-1 Bottle Cleaning Brush for Water Bottle, Antistatic Lab Brushes, Straws Black |
|
| 3 | Amazon Brand - Mama Bear Baby Bottle Brush with Nipple Cleaner and Suction Cup Stand, White (Pack of 3) |
|
| 4 | ROSEOK 2 in 1 Long Handle Bottle Brush with Straw Brush for Cleaning Glass, Sports Bottle, Coffee Mug,Navy Blue,1 Pack |
|
| 5 | Munchkin Sponge Bottle Brush, Grey/Sage, 2 Count (Pack of 1) |
|
| 6 | OXO Tot Bottle Brush with Stand, Baby Bottle Brush |
|
| 7 | Scotch-Brite Glass and Water Bottle Brush, Long-Lasting, Safe on Glassware, Shaker Bottles, Food Processors, & More, Non-slip handle, Durable, Reusable, Clean in Top Rack of Your Dishwasher |
|
| 8 | ALINK 16 inch Long Bottle Brush Cleaner for Washing Wine/Beer/Sport Well/Thermos/Glass, Hummingbird Feeder and Long Narrow Neck Sport Bottles |
|
| 9 | MR.SIGA Long Handle Bottle Brush, Flexible Scrub Brush for Water Bottles, Glasswares, Mugs, Black, 2 Pack |
|
| 10 | Momcozy Bottle Brush Kit with Push-Press Foam Design - Newborn Essentials Gift, Portable Cleaning Tool for Home & Travel, Baby Bottle Cleaner Brush for Breast Pumps & Nipples, Green |
|
Begin by completely disassembling your water bottle. This means removing the lid, straw (if applicable), and most importantly, carefully detaching the rubber or silicone gasket from the lid. Many gaskets can be pried out with a fingernail or a small, blunt tool. Once separated, rinse all parts, especially the gasket, under hot, soapy water to remove any loose debris, food particles, or surface grime. This initial wash clears the way for the specialized mold-killing treatments.
Method 1: Vinegar Soak (Natural & Gentle)
White vinegar is a natural and effective mold killer due to its mild acidity. This method is excellent for regular cleaning and preventing mold recurrence, especially for silicone gaskets.
To use, create a solution of equal parts white vinegar and warm water in a bowl or small container. Submerge the detached gasket completely in this solution, ensuring all mold-affected areas are covered. Let the gasket soak for several hours, ideally overnight, to allow the vinegar ample time to penetrate and kill the mold spores. After soaking, use a small brush (like an old toothbrush) to scrub away any remaining mold residue, paying close attention to the creases and edges. Rinse the gasket thoroughly under running water to eliminate any vinegar smell and mold debris. The main advantage is its safety and natural origin, while a minor drawback might be a lingering vinegar scent, which dissipates with thorough rinsing and drying.
Method 2: Baking Soda Paste (For Tough Stains & Deodorizing)
Baking soda acts as a gentle abrasive and a powerful deodorizer, making it ideal for tackling persistent mold stains and unpleasant odors. This method can be used in conjunction with or as an alternative to vinegar.
To create the paste, mix two tablespoons of baking soda with a small amount of water until it forms a thick, spreadable consistency. You can also add a drop of dish soap for extra cleaning power. Apply this paste generously to all moldy areas of the gasket, ensuring it gets into every crevice. Let the paste sit for 10 to 15 minutes to allow the baking soda to work its magic, lifting stains and neutralizing odors. Using your small brush, vigorously scrub the gasket, focusing on areas with visible mold or discoloration. Rinse the gasket thoroughly with warm water until all baking soda residue is gone. Baking soda is excellent for removing stains and odors without damaging the gasket, though it might require more scrubbing for deeply embedded mold.
Method 3: Hydrogen Peroxide Rinse (Disinfecting Power)
For its strong disinfecting properties, 3% hydrogen peroxide is an effective option for sanitizing gaskets and killing lingering mold spores.
Prepare a solution by mixing three parts water with one part 3% hydrogen peroxide. Place the gasket into this solution, ensuring it is fully immersed. Allow the gasket to soak for 10 to 15 minutes. The peroxide will work to break down mold and bacteria. After soaking, gently scrub the gasket with a small brush to dislodge any remaining mold. Rinse the gasket exceptionally well under clean running water to remove all traces of hydrogen peroxide before reassembling. This method offers potent disinfection, but ensure proper dilution and thorough rinsing to avoid any residue.
Method 4: Bleach Solution (Last Resort for Stubborn Mold)
While effective for severe mold, a bleach solution should be considered a last resort due to its potential to affect certain materials and requiring extremely careful rinsing.
If other methods have failed, you can prepare a diluted bleach solution by mixing one part bleach with four parts water. Submerge the gasket in this solution and let it soak overnight. After soaking, it is absolutely critical to scrub the gasket meticulously and rinse it extensively under clean, running water for several minutes to ensure all bleach residue is removed. Exercise extreme caution: bleach can potentially degrade silicone over time or cause discoloration, and any remaining residue can be harmful if ingested. Ensure the gasket is compatible with bleach before attempting this method.
Final Steps
Regardless of the method chosen, the final steps are universal and crucial for preventing immediate mold re-growth. After scrubbing and rinsing, ensure the gasket is completely dry before reassembling it into your water bottle. You can air dry it on a clean rack, use a clean towel, or even a hairdryer on a low setting to ensure every drop of moisture is gone. This step is non-negotiable, as residual moisture is the number one cause of mold return.
Comparing DIY Mold Removal Methods
Choosing the right mold removal method depends on the severity of the mold, the material of your gasket, and your preference for natural versus stronger cleaners. Below is a comparative overview of the most common DIY solutions.
| Method | Effectiveness Against Mold | Safety for Gaskets (Silicone/Rubber) | Ease of Use | Stain Removal | Odor Removal |
|---|---|---|---|---|---|
| Vinegar Soak | Good | High (generally safe) | Easy | Moderate | Good |
| Baking Soda Paste | Good | High (gentle abrasive) | Medium (mixing) | Good | Excellent |
| Hydrogen Peroxide | Excellent | High (with proper dilution) | Easy | Moderate | Good |
| Bleach Solution | Excellent (potent killer) | Medium (potential for degradation) | Medium (cautions) | Excellent | Excellent |
Vinegar and baking soda are excellent starting points for most mold issues, offering safe and effective cleaning. Hydrogen peroxide provides robust disinfection. Bleach should be reserved for the most stubborn cases, always used with caution and followed by rigorous rinsing.
Preventing Future Mold Growth on Water Bottle Gaskets
Preventing mold is far easier than removing it. Establishing good habits and routines is paramount to keeping your water bottle gaskets consistently mold-free and ensuring safe hydration.
Establish a Regular Cleaning Routine
Consistency is key in the fight against mold. Make it a habit to rinse your water bottle and its components immediately after each use with hot water. This simple step can wash away fresh residues before mold has a chance to set in. A more thorough wash with dish soap and warm water should be performed every day or every other day, especially if you use your bottle for beverages other than plain water. The goal is to eliminate any organic matter that could serve as food for mold spores.
Master Thorough Drying Techniques
Moisture is mold’s best friend. After washing, it’s crucial to ensure every part of your water bottle, especially the gasket, is completely dry before reassembly or storage. Air drying disassembled parts on a drying rack, upside down, allows air circulation and prevents water from pooling. For those hard-to-reach crevices in gaskets, a clean towel or even a hairdryer on a low, cool setting can help wick away residual moisture. Never put a damp bottle or gasket back together or into a cabinet.
Smart Storage and Usage Habits
How you store and use your bottle significantly impacts mold prevention. When not in use, always store your water bottle disassembled or with its lid ajar to promote airflow and prevent moisture from getting trapped inside. Avoid leaving a wet bottle sealed for extended periods, as this creates the ideal dark, damp environment for mold. For an extra layer of protection, consider occasionally placing your clean, dry bottle and gasket in the freezer overnight, as freezing can help inhibit microbial growth.
Inspect Regularly
Make it a habit to visually inspect your water bottle gaskets for any signs of mold or discoloration. Early detection allows for prompt cleaning, preventing the mold from spreading and becoming more challenging to remove. If you notice any stubborn discoloration that persists even after thorough cleaning, it might be an indicator that the mold has deeply embedded itself or stained the material. In such cases, or if the gasket appears worn or damaged, it might be time to replace the gasket or the entire bottle for optimal hygiene.
Expert Tips for Maintaining a Mold-Free Water Bottle
As someone with years of experience in maintaining household items, I can’t stress enough the importance of these practices for your water bottle’s longevity and your health.
The most critical piece of advice is to always disassemble all removable parts – especially the gasket – every single time you clean your water bottle. It’s easy to overlook, but mold thrives in hidden spots. Secondly, complete drying is non-negotiable. Even a tiny bead of water can jumpstart mold growth. If you’re unsure if a tricky gasket crevice is dry, give it a blast with a hairdryer on a cool setting.
Remember that silicone and rubber gaskets are porous to a degree, and over time, stains might set in even if the mold is dead. If a gasket consistently molds despite your best efforts, or if it shows signs of wear, discoloration that won’t come out, or loss of elasticity, it’s time for a replacement. Many manufacturers sell replacement gaskets, which is often a more sustainable choice than buying a new bottle. Choosing water bottles with simpler designs and fewer hard-to-reach crevices can also significantly reduce your cleaning burden. Prioritizing hygiene ensures that your daily hydration is always a refreshing and healthy experience.
Conclusion
Maintaining a mold-free water bottle gasket is essential for your health and for extending the life of your reusable bottle. While the appearance of mold can be disconcerting, effective DIY solutions such as vinegar soaks, baking soda pastes, and hydrogen peroxide rinses offer reliable ways to remove it. More importantly, consistent preventative measures—including daily cleaning, meticulous drying, and smart storage habits—are your best defense against future mold growth. By integrating these simple yet powerful practices into your routine, you can ensure that your water bottle always provides safe, clean, and refreshing hydration. What aspect of water bottle maintenance do you find most challenging in your daily life?
Frequently Asked Questions
Can I put my water bottle gasket in the dishwasher?
Many water bottle gaskets are dishwasher-safe, especially those made of silicone. However, always check the manufacturer’s instructions. For best results, ensure the gasket is separated from the lid and placed in the top rack to prevent warping or damage.
How often should I clean my water bottle gasket?
For optimal hygiene, you should aim to clean your water bottle and its gasket daily with soap and hot water. If you’re only drinking plain water, a thorough wash every other day might suffice, but never go longer than a few days without cleaning.
Why does mold keep coming back on my water bottle gasket?
Mold recurrence is usually due to incomplete drying or infrequent cleaning. Mold thrives in damp, dark environments. Ensure you completely disassemble all parts, thoroughly dry the gasket, and store the bottle with its lid open to promote airflow after every use.
Is black mold on a water bottle gasket dangerous?
While not all black mold is the highly toxic Stachybotrys chartarum, any mold in your drinking water can pose health risks. It can cause allergic reactions, respiratory issues, and other sensitivities. It’s always best to remove mold immediately and thoroughly.
Can I use boiling water to clean my water bottle gasket?
Soaking a silicone or rubber gasket in boiling water for a few minutes can help loosen grime and kill some mold, especially for baby bottle nipples. However, extreme heat can potentially damage or warp some materials over time, so ensure your gasket is heat-resistant and always let it cool completely before handling.